
Table of Contents
There’s something deeply satisfying about creating a meal that’s both simple and delicious. For me, it’s the kind of dish that brings comfort to the table and smiles to the faces of those I cook for. Over the years, I’ve perfected a method that turns an everyday ingredient into something extraordinary.
Thank you for reading this post, don't forget to subscribe!
This recipe is a blend of basic techniques and personal touches, inspired by trusted online resources and countless kitchen experiments. The result? A juicy, tender dish that’s incredibly easy to prepare. Whether you’re cooking for one or a family of four, this method ensures consistent success every time.
What I love most is how versatile it is. Pair it with salads, pasta, or casseroles—it’s a meal that adapts to your cravings. If you’ve ever struggled with dry or bland results, this approach will change the game. Let’s dive into the details and make your next meal unforgettable.
Key Takeaways
- This method ensures juicy, tender results every time.
- It’s inspired by trusted online recipes and personal tweaks.
- Perfect for meals serving 1 to 4 people.
- Versatile enough to pair with salads, pasta, or casseroles.
- Simple steps make it beginner-friendly.
Introduction: My Love for a Perfect Chicken Recipe
Cooking has always been my way of bringing joy to the table. Over the years, I’ve discovered that the simplest dishes often leave the biggest impression. One of my favorites is a dish that’s both easy to prepare and incredibly satisfying. It’s a method I’ve refined through trial and error, and it never fails to deliver.
Why I Choose This Method
What draws me to this approach is its simplicity. Using just a few key ingredients like olive oil and basic seasonings, I can create a dish that’s flavorful and tender. It’s a method that works for any occasion, whether I’m cooking for myself or a group of friends.
My Journey to Tender, Juicy Results
My journey with this dish started with a lot of experimentation. I tried different techniques, learned from my mistakes, and eventually found a method that works every time. The key is to focus on even cooking and proper seasoning. This ensures that every bite is as good as the last.
Here’s a quick breakdown of what makes this method so effective:
| Step | Key Detail |
|---|---|
| Preparation | Season generously and let the meat rest. |
| Cooking | Use the right temperature for even results. |
| Resting | Allow the dish to rest before serving. |
This recipe isn’t just about food—it’s about the experience. I invite you to try it for yourself and see how it transforms your meals. Let’s make cooking an adventure together!
Ingredients That Make a Difference
The foundation of any great dish lies in the quality of its ingredients. For this method, every component plays a crucial role in achieving tender, flavorful results. Let’s break down what you’ll need and why each item matters.
Choosing the Best Chicken Breasts
Selecting high-quality chicken is the first step to success. Look for fresh, evenly sized pieces to ensure even cooking. I prefer boneless, skinless options for their versatility and ease of preparation. If you’re looking for extra flavor, bone-in cuts can add depth to your dish.
Brining is another game-changer. A quick soak in a saltwater solution for as little as 15 minutes can lock in moisture, making every bite juicier. This simple step is worth the extra effort.
Key Accessories: Olive Oil, Butter, and Seasonings
Olive oil and butter are my go-to fats for cooking. They add richness and help create a golden, crispy exterior. For seasonings, I keep it simple with garlic powder, salt, and pepper. These basics enhance the natural flavor without overpowering it.
Here’s a quick guide to the key ingredients and their roles:
| Ingredient | Role |
|---|---|
| Chicken Breasts | Main protein, ensures even cooking |
| Olive Oil | Adds moisture and aids browning |
| Butter | Enhances richness and flavor |
| Seasonings | Elevates taste without complexity |
Using fresh, quality ingredients is the foundation for a superior meal. For more tips on achieving crispy perfection, check out this braised chicken recipe.
Essential Kitchen Tools and Equipment
Having the right tools in the kitchen can make all the difference in achieving perfect results. Over the years, I’ve discovered that a few key pieces of equipment are essential for creating a dish that’s both flavorful and consistent. Let’s dive into the must-haves and why they matter.
First, a reliable oven is non-negotiable. Whether you’re baking or roasting, consistent heat ensures even cooking. I recommend preheating your oven to 450°F for optimal results. This temperature helps lock in moisture and creates a golden exterior.
Next, a sturdy baking dish is crucial. I prefer using metal or ceramic dishes because they distribute heat evenly. Glass dishes are great too, but remember they have a maximum temperature limit—usually around 425°F. Exceeding this can cause cracking.
An instant-read thermometer is another game-changer. It ensures your dish reaches the safe internal temperature of 165°F without overcooking. I’ve found this tool especially helpful for achieving juicy results every time.
Mixing bowls are also essential for preparing seasoning blends and marinades. I like to have a set in various sizes for versatility. They make prep work efficient and mess-free.
Here’s a quick breakdown of the tools and their roles:
| Tool | Role |
|---|---|
| Oven | Ensures consistent, even heat |
| Baking Dish | Distributes heat for even cooking |
| Thermometer | Guarantees safe internal temperature |
| Mixing Bowls | Prepares seasonings and marinades |
If you’re on a budget, don’t worry. Many of these tools are affordable and widely available. A basic oven thermometer costs around $14, and a good baking dish can be found for under $20. Investing in these essentials will transform your cooking experience.
Step-by-Step: How I Prepare and Brine My Chicken
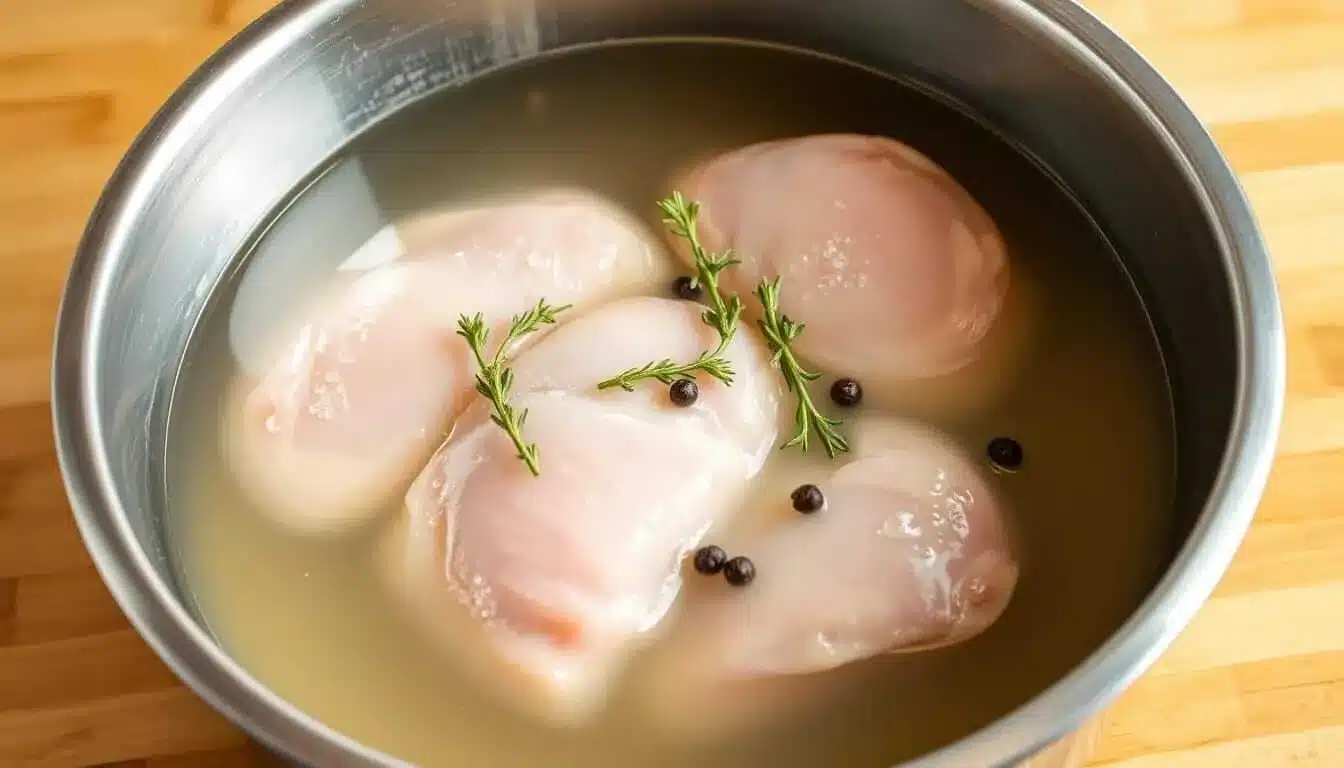
Brining is a simple yet transformative step that elevates any dish. It locks in moisture and enhances flavor, ensuring every bite is tender and juicy. Over the years, I’ve refined my brining technique to achieve consistent results. Here’s how I do it.

Mastering the Brine Process
I start by mixing lukewarm water with salt, using a ratio of 1/3 cup of salt per 4 cups of water. This ensures the salt dissolves evenly. Once mixed, I cool the solution with ice or cold water to bring it to the right temperature.
The ideal brining time is between 30 minutes and 6 hours. For a quick brine, 15 minutes works, but longer brining (up to 6 hours) deepens the flavor. I always avoid over-brining, as it can make the meat too salty.
Prepping for Even Cooking
After brining, I rinse the meat thoroughly to remove excess salt. Then, I pat it dry with paper towels. This step is crucial for achieving a crispy exterior during cooking.
I also ensure the meat is evenly prepped by trimming any excess fat or uneven edges. This helps it cook uniformly, preventing dry spots. These precise steps are essential for creating a juicy, tender result every time.
By following this method, I’ve found that brining transforms even the simplest dish into something extraordinary. It’s a technique that’s worth the extra effort for the incredible results it delivers.
My 5-Step Method: Brush, Rub, Roast, and Rest
Every great meal starts with a clear, step-by-step approach. Over the years, I’ve developed a 5-step method that ensures tender, flavorful results every time. It’s simple, effective, and perfect for both beginners and seasoned cooks.
The Art of Brushing and Rubbing
The first step is brushing the meat with melted butter or olive oil. This creates a luscious exterior that locks in moisture. Next, I apply a seasoning rub evenly. A mix of salt, pepper, and garlic powder works wonders. The key is to coat every inch for maximum flavor.
Roasting Techniques for a Crispy Finish
Roasting at 450°F is my go-to method. The high heat creates a crispy exterior while keeping the inside juicy. I always use an oven thermometer to ensure accuracy. This step is crucial for achieving that perfect balance of texture and flavor.
After roasting, I let the dish rest for 5 minutes. This allows the juices to redistribute, making every bite tender and delicious. It’s a small step that makes a big difference.
Pair this dish with a fresh salad or your favorite side for a complete meal. This method is versatile and adapts to any occasion. Try it, and you’ll see why it’s become my signature approach.
Baking Techniques for a Tender Outcome
The secret to tender results lies in the details of temperature and timing. Whether you’re working with boneless or bone-in options, understanding these elements ensures a juicy, flavorful dish every time. Let’s break down the key factors that make all the difference.
Optimal Temperatures and Timings
Baking at the right temperature is crucial. I’ve found that 450°F works best for locking in moisture while creating a golden exterior. For boneless cuts, aim for 15-18 minutes, depending on thickness. Bone-in options may require 30-35 minutes for even cooking.
A few minutes can make or break the texture. Overcooking dries out the protein, while undercooking leaves it unsafe. Using an instant-read thermometer ensures the internal temperature reaches 165°F, the FDA-recommended safe level.
Boneless vs. Bone-In Techniques
Boneless cuts are quicker to cook and easier to prep, making them ideal for busy days. Bone-in options, however, add depth of flavor and retain moisture better. Adjust your timing accordingly to suit your choice.
Here’s a quick guide to help you decide:
- Boneless: Cook for 15-18 minutes at 450°F.
- Bone-In: Cook for 30-35 minutes at 425°F.
Seasoning for Flavor
Garlic powder is a staple in my seasoning mix. It adds a subtle, savory note without overpowering the dish. Combine it with salt, pepper, and smoked paprika for a balanced blend that enhances the natural flavor of the protein.
By mastering these techniques, you’ll achieve tender, juicy results every time. Whether it’s a quick weeknight meal or a special occasion dish, these tips ensure success.
How to Use Seasonings and Create Flavorful Variations
Seasoning is the heart of any dish, transforming simple ingredients into something extraordinary. Over the years, I’ve learned that the right blend of spices can make even skinless options shine. Let’s dive into my approach to mixing spices and creating variations that suit every palate.
Mixing My Favorite Spices
I start with a base of garlic powder, paprika, and salt. These staples add depth without overwhelming the dish. For a smoky twist, I include smoked paprika. A pinch of cayenne pepper brings a subtle heat that complements the natural flavors.
Precision is key. I measure each spice carefully to maintain consistency. A digital scale or measuring spoons ensures the perfect balance every time. This attention to detail makes all the difference in cooking.
Customizing for Diverse Tastes
Seasoning blends are versatile. For a Mediterranean flair, I add oregano and thyme. A touch of cumin and coriander creates a Middle Eastern vibe. The possibilities are endless, and experimenting is part of the fun.
Using a thermometer ensures the seasoning penetrates evenly. It’s not just about temperature—it’s about flavor distribution. This tool is a game-changer for achieving consistent results.
| Spice Blend | Key Ingredients |
|---|---|
| Classic | Garlic powder, paprika, salt, pepper |
| Smoky | Smoked paprika, cayenne, garlic powder |
| Mediterranean | Oregano, thyme, garlic powder, lemon zest |
Don’t be afraid to experiment. Create your own signature blend and make every meal uniquely yours. With the right spices, even skinless options can become a culinary masterpiece.
Comparing Boneless vs. Bone-In Chicken Breasts
Choosing the right cut of meat can elevate your dish from good to great. Whether you prefer boneless, skinless options or bone-in cuts with crispy skin, each has its unique advantages. Understanding these differences helps you adapt your cooking methods for the best results.

Tips for Boneless, Skinless Options
Boneless, skinless cuts are lean and quick to cook, making them ideal for busy weeknights. However, they can dry out if overcooked. To prevent this, I recommend brining the meat for 15-30 minutes before cooking. This locks in moisture and enhances flavor.
When baking, keep the temperature at 425°F and cook for 15-18 minutes. Use an instant-read thermometer to ensure the internal temperature reaches 165°F. This method ensures juicy, tender results every time.
Benefits of Bone-In with Crispy Skin
Bone-in cuts, especially with the skin on, retain more moisture and flavor during cooking. The bone helps distribute heat evenly, while the skin crisps up beautifully when baked at 450°F. For extra crispiness, poke small holes in the skin’s fat deposits before cooking.
These cuts are perfect for low and slow methods like roasting or braising. They’re also more budget-friendly, offering better value for your money. If you’re looking for a richer, more flavorful dish, bone-in is the way to go.
| Type | Advantages | Challenges |
|---|---|---|
| Boneless, Skinless | Quick to cook, leaner | Prone to drying out |
| Bone-In with Skin | Retains moisture, flavorful | Longer cooking time |
Ultimately, the choice depends on your recipe and personal preference. Both options can shine when prepared with the right techniques. Experiment with both to discover which works best for your cooking style.
Serving Inspiration: Easy Sides and Pairings
Pairing the right sides with your meal can elevate the entire dining experience. Whether you’re looking for something light or hearty, the perfect side dish complements the main ingredient and enhances its flavor. Here are some creative ideas to inspire your next meal.
Fresh Salad Options and Other Sides
A crisp, fresh salad is always a great choice. I love mixing greens with cherry tomatoes, cucumbers, and a sprinkle of feta cheese. A simple tablespoon of lemon vinaigrette adds a zesty kick that ties everything together. For something heartier, roasted vegetables like Brussels sprouts or carrots are a delicious option.
If you’re short on time, steamed veggies or a quinoa salad are quick and nutritious. I often store leftovers in a container for easy lunches the next day. These sides not only add variety but also balance the meal beautifully.
Here are some of my favorite pairings:
- Light Option: Mixed greens with a citrus dressing.
- Hearty Choice: Roasted sweet potatoes and broccoli.
- Quick Fix: Steamed green beans with a drizzle of olive oil.
Don’t be afraid to experiment with different combinations. A single tablespoon of a flavorful sauce or dressing can transform a simple side into something extraordinary. Whether you prefer a light salad or a hearty vegetable medley, the possibilities are endless.
Leftovers can also be repurposed into a delicious chicken salad or wrap. Just store them in a container and add your favorite ingredients the next day. This not only saves time but also reduces food waste.
Ultimately, the key is to choose sides that suit your personal taste and dietary needs. With a little creativity, you can create a meal that’s both satisfying and full of flavor.
Meal Prep and Storage Solutions
Meal prep is a game-changer for busy weeks, and proper storage ensures your meals stay fresh and flavorful. Whether you’re cooking for one or a family, these tips will help you make the most of your efforts. Let’s dive into the best practices for refrigeration, freezing, and reheating.
Refrigeration and Freezing Guidelines
For short-term storage, refrigerate your meals in airtight containers. This keeps them fresh for up to 3-4 days. Label each container with the date to track freshness. If you’re prepping for the long term, freezing is your best option. Properly stored, meals can last for several months.
When portioning, consider the thickness of each piece. Thicker cuts may require longer reheating times. I recommend dividing meals into single servings for convenience. This makes it easy to grab and go without thawing more than you need.
Proper Containers and Reheating Tips
Using the right containers is crucial. Glass or BPA-free plastic containers with tight-fitting lids work best. They prevent leaks and maintain freshness. For reheating, preheat oven to 400°F and warm meals for 15-20 minutes. This ensures even heating without drying out the food.
If you’re short on time, a quick video tutorial can demonstrate these techniques. Visual guides are especially helpful for beginners. They show you exactly how to place meals in the oven or microwave for optimal results.
| Storage Method | Duration | Tips |
|---|---|---|
| Refrigeration | 3-4 days | Use airtight containers, label dates |
| Freezing | Up to 3 months | Portion by thickness, use freezer-safe containers |
By following these strategies, you can enjoy stress-free meals all week. Proper storage and reheating techniques ensure every bite is as delicious as the first. Start prepping today and make your busy days a little easier!
Advanced Tips for Cooking Perfection
Achieving perfection in the kitchen often comes down to precision and timing. Small adjustments in technique can make a big difference in the final result. Here are some advanced tips to help you elevate your cooking game.
Utilizing an Instant-Read Thermometer
An instant-read thermometer is a must-have tool for ensuring your dish reaches the perfect internal temperature. The FDA recommends cooking poultry to at least 165°F for safety. Insert the thermometer into the thickest part of the meat to get an accurate reading. This simple step prevents overcooking and keeps every bite juicy.
Adjusting Timing for Thickness Variations
Thicker cuts require longer cooking times, while thinner pieces cook faster. For example, a 5 oz piece may take 18-20 minutes, while a 9 oz piece could need 22-25 minutes. Always adjust your timing based on the thickness to ensure even cooking. This prevents dry spots and ensures a tender result.
Here’s a quick guide to help you plan your cooking times:
| Thickness | Cooking Time |
|---|---|
| 5 oz | 18-20 minutes |
| 7 oz | 20-22 minutes |
| 9 oz | 22-25 minutes |
Organizing your kitchen for meal prep can also save time and stress. Use airtight containers to store prepped ingredients, and label them with dates for freshness. This makes it easy to place chicken in the oven or skillet without extra prep work.
For a flavorful twist, try turning leftovers into a chicken salad. Simply chop the cooked meat, mix with your favorite dressing, and serve on greens or in a wrap. It’s a quick and delicious way to repurpose meals.
If you’re looking for more inspiration, check out this Boursin Chicken, Mushroom, and Asparagus Skillet recipe. It’s a one-pan meal that’s both flavorful and easy to prepare.
By mastering these advanced techniques, you’ll achieve consistent, delicious results every time. Experiment with these tips and refine your cooking process to make every meal a success.
Conclusion
Mastering a dish like this is all about following clear instructions and paying attention to detail. From brining to resting, each step plays a crucial role in achieving tender, flavorful results. Precision in technique ensures consistency, making it a go-to meal for any occasion.
I encourage you to try this method and adapt it to your kitchen style. Whether you’re a beginner or a seasoned cook, small adjustments can make a big difference. Don’t hesitate to experiment with seasonings or cooking times to suit your taste.
Feel free to share your feedback or ask questions. Cooking is a journey, and I’m here to support you every step of the way. With practice, this dish can easily become a monthly favorite in your home.
For more inspiration, check out this classic recipe that complements this method perfectly. Happy cooking!
FAQ
What’s the best way to ensure my chicken stays juicy?
I always brine my chicken before cooking. It locks in moisture and enhances flavor. Letting it rest after baking also helps keep it tender.
Should I use boneless or bone-in chicken for roasting?
Both work well! Boneless cooks faster and is easier to slice, while bone-in adds extra flavor and keeps the meat moist.
What’s the ideal oven temperature for baking chicken?
I preheat my oven to 375°F (190°C) for even cooking. This temperature ensures a crispy exterior while keeping the inside juicy.
How long should I bake chicken breasts?
It depends on thickness, but I usually bake them for 20-25 minutes. Using an instant-read thermometer helps—aim for 165°F (74°C) internally.
Can I prepare this dish ahead of time?
Absolutely! I often marinate or brine the chicken the night before. Cooked chicken can also be stored in the fridge for up to 3 days or frozen for later use.
What are some easy side dishes to pair with baked chicken?
I love serving it with a fresh salad, roasted veggies, or a side of mashed potatoes. It’s versatile and pairs well with almost anything!
How do I add more flavor to my chicken?
I use a mix of olive oil, garlic powder, salt, and pepper as a base. Experiment with herbs like rosemary or thyme for a unique twist.
Can I use skinless chicken for this recipe?
Yes, skinless works perfectly! Just brush it with olive oil or butter to keep it moist and flavorful during baking.