
Table of Contents
Mouthwatering Stuffed Chicken Breast Recipe You’ll Love
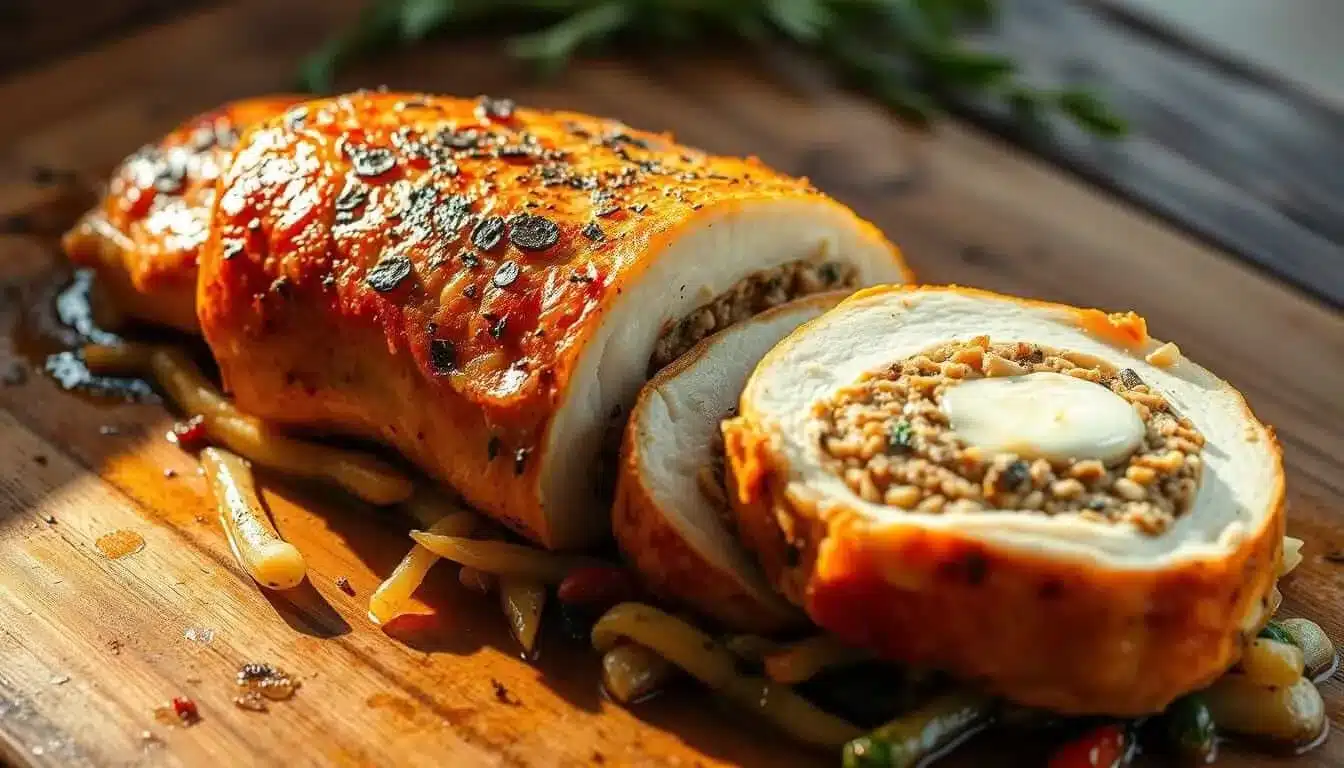
Thank you for reading this post, don't forget to subscribe!There’s something magical about turning simple ingredients into a meal that feels like a celebration. I’ve always loved cooking, but discovering how to elevate the humble chicken breast into something extraordinary has been a game-changer. This dish combines juicy, tender meat with a creamy, flavorful filling that’s sure to impress.

What makes this recipe special is how easy it is to prepare, even for beginners. With just a few common ingredients like cream cheese, mozzarella, and spinach, you can create a gourmet meal in no time. The secret lies in the stuffing, which keeps the meat moist and adds a burst of flavor in every bite.
Whether you’re cooking for a weeknight dinner or hosting friends, this dish is a winner. I’ll guide you step-by-step, sharing pro tips to ensure your success. Let’s get started and make something delicious together!
Key Takeaways
- Transform simple chicken into a gourmet meal with this easy recipe.
- Uses common ingredients like cream cheese, mozzarella, and spinach.
- Perfect for weeknight dinners or special occasions.
- Step-by-step guidance ensures success for beginners.
- Juicy, flavorful, and sure to impress everyone at the table.
Introduction to My Favorite Chicken Recipe
I never thought I’d fall in love with chicken breasts again until I discovered this game-changing method. For years, I leaned toward thighs for their juiciness, but this dish brought the humble breast back into my weekly rotation. It’s now my go-to for a quick, flavorful meal.
What makes this recipe stand out is the stuffing. By filling the chicken with a creamy mixture, you lock in moisture and create a burst of flavor in every bite. A touch of garlic, a pinch of pepper, and a teaspoon of salt elevate the dish to something truly special.
What I love most is how easy it is. Even on busy nights, I can whip up this meal without stress. The method is innovative yet straightforward, making it perfect for both beginners and seasoned cooks. If you’re curious, check out this Boursin-stuffed chicken recipe for inspiration.
This dish has become a staple in my kitchen, and I’m excited to share it with you. Let’s dive into the details and make something delicious together!
Essential Ingredients for a Flavorful Dish
The foundation of any great dish lies in the quality of its ingredients. For this recipe, every component plays a role in creating a meal that’s both delicious and satisfying. From fresh produce to creamy cheeses, each element adds depth and flavor.
Fresh & Frozen Produce
Using fresh or high-quality frozen produce ensures your dish bursts with flavor. Spinach is a star ingredient here, adding both texture and nutrients. If using frozen spinach, make sure to squeeze it thoroughly to remove excess moisture.
For a touch of sweetness, consider adding cherry tomatoes or roasted bell peppers. These ingredients not only enhance the taste but also add vibrant color to your plate.
Creamy Cheeses and Seasonings
The filling is where the magic happens. A blend of cream cheese and mozzarella creates a rich, creamy texture that’s hard to resist. Opt for high-quality cheeses to ensure the best results.
Seasoning is equally important. A pinch of garlic, a dash of pepper, and a sprinkle of salt bring out the flavors in every bite. These simple additions make the dish truly special.
| Ingredient | Quantity | Purpose |
|---|---|---|
| Spinach | 10 oz (frozen) | Adds texture and nutrients |
| Cream Cheese | 4 oz | Creates a creamy filling |
| Mozzarella | 2 oz | Enhances richness |
| Garlic | 2 cloves | Adds depth of flavor |
| Cherry Tomatoes | 1 cup | Provides sweetness and color |
By combining these ingredients, you create a filling that’s both flexible and flavorful. Whether you’re cooking for family or friends, these components ensure a dish that’s sure to impress.
Tools and Equipment I Rely On
Having the right tools in the kitchen can make all the difference in creating a meal that’s both delicious and stress-free. Over the years, I’ve discovered that a few essential items can simplify the process, making even a novice feel like a professional chef.
Must-Have Kitchen Essentials
One of my go-to tools is a cast iron skillet. Its even heat distribution ensures your dish cooks perfectly every time. Whether you’re searing or sautéing, a 12-inch skillet is versatile enough for most recipes.
A sharp chef’s knife is another must-have. It makes prepping ingredients quick and effortless. Pair it with a sturdy cutting board, and you’re ready to tackle any recipe.
For combining ingredients, a mixing bowl is indispensable. I prefer a medium-sized one—it’s just the right size for blending fillings without making a mess.
When it comes to cooking, the type of oil you use matters. I always reach for extra virgin olive oil. Its rich flavor enhances the dish without overpowering it.
| Tool | Purpose |
|---|---|
| Cast Iron Skillet | Ensures even cooking and heat distribution |
| Chef’s Knife | Makes prepping ingredients quick and easy |
| Mixing Bowl | Perfect for blending fillings and ingredients |
| Extra Virgin Olive Oil | Adds rich flavor to your dishes |
Investing in these tools has transformed my cooking experience. They’re reliable, easy to use, and help me achieve consistently great results. With the right equipment, you’ll feel confident tackling any recipe.
Simple Stuffed Chicken Breast Recipe Instructions
Cooking doesn’t have to be complicated to feel special. With a few steps, you can transform a basic meal into a masterpiece. Let’s dive into the process of creating this flavorful dish.
Prepping and Pocketing the Chicken
Start by preparing the chicken. Use a sharp knife to create a pocket in each piece. Make sure the cut is even and deep enough to hold the filling without tearing the meat. This step ensures the flavors are locked in.
Season both the inside and outside with a pinch of *salt* and *pepper*. This simple step enhances the natural taste of the meat and balances the richness of the filling.
Creating the Delicious Filling
Next, mix the filling. Combine softened cream cheese, shredded mozzarella, minced *garlic*, and chopped spinach in a bowl. The result is a creamy, flavorful mixture that’s easy to work with.
Feel free to adjust the ingredients to suit your taste. For example, add sun-dried tomatoes or a sprinkle of Parmesan for extra depth. The filling is versatile and forgiving.
Sealing and Stuffing with Care
Carefully stuff each pocket with the mixture. Use your fingers or a spoon to ensure the filling is evenly distributed. Seal the edges with toothpicks to prevent the filling from leaking during cooking.
Heat a skillet over medium-high heat and add a drizzle of olive oil. Sear the chicken for 3-4 minutes on each side until golden brown. This step locks in moisture and adds a beautiful crust.
| Step | Key Tip |
|---|---|
| Prepping | Use a sharp knife for even pockets |
| Filling | Mix ingredients thoroughly for consistency |
| Cooking | Sear on medium-high heat for a golden crust |
For more tips on achieving the perfect balance of tender meat and crispy skin, check out this braised chicken recipe. It’s a great way to explore new techniques and flavors.
Cooking Techniques I Love for a Perfect Finish
Achieving the perfect finish on a dish is all about mastering the right techniques. Whether you’re using the stovetop, oven, or air fryer, the key lies in balancing heat and time. Let me share my favorite methods to ensure a beautifully seared exterior and a tender interior every time.
Stovetop Searing and Butter Finishing
For a golden crust, I start with stovetop searing. Heat a skillet over medium-high heat and add a drizzle of oil. Sear the meat for 3-4 minutes on each side until it’s golden brown. This locks in moisture and creates a flavorful crust.
To enhance browning, I add a knob of butter during the last minute of cooking. The butter adds richness and helps achieve that perfect caramelized finish. Always check the thickest part of the meat with a thermometer to ensure it reaches 165°F.
Oven and Air Fryer Alternatives
If you prefer using an oven, preheat it to 375°F. After searing, transfer the dish to the oven for 15-20 minutes. This method ensures even cooking and a juicy interior.
For a quicker option, the air fryer works wonders. Set it to 350°F and cook for 20 minutes. If you’re preparing more than two portions, increase the time to 25-30 minutes. Monitor the heat closely to avoid overcooking.
| Method | Temperature | Time |
|---|---|---|
| Stovetop Searing | Medium-High Heat | 3-4 minutes per side |
| Oven Finishing | 375°F | 15-20 minutes |
| Air Fryer | 350°F | 20 minutes |
No matter which method you choose, monitoring the heat and time is crucial. For more inspiration on cooking techniques, check out this spinach-stuffed chicken recipe. It’s a great way to explore new flavors and methods.
Tips to Enhance Flavor and Texture
Small tweaks can transform a good meal into something unforgettable. Whether you’re looking to add depth to the fill or improve the overall texture, these tips will help you elevate your dish effortlessly.
Ingredient Swaps and Add-ons
One of the easiest ways to enhance flavor is by swapping or adding ingredients. For a richer taste, try using bacon or sun-dried tomatoes in the stuff. These add a savory depth that complements the creamy filling perfectly.
If you’re looking for a fresh twist, consider adding herbs like basil or parsley. They bring a burst of color and a refreshing flavor. For a cheesy upgrade, swap mozzarella with Parmesan or feta for a tangy kick.

Pairing your dish with the right side can also make a big difference. Roasted vegetables or a light salad add texture and balance to the meal. For a heartier option, try garlic mashed potatoes or a grain pilaf.
- Use toothpicks to secure the fill and prevent it from leaking during cooking.
- Opt for fresh ingredients whenever possible—they enhance both flavor and texture.
- Experiment with different cheeses to find your favorite combination.
- Add a drizzle of balsamic glaze or a sprinkle of nuts for a gourmet touch.
My personal favorite add-ons include roasted red peppers and a hint of smoked paprika. These small changes can make a big impact, turning a simple dish into a standout meal.
Customizing Your Filling for Personal Taste
One of the best parts of cooking is making a dish uniquely yours. This recipe is incredibly flexible, allowing you to experiment with flavors and ingredients to suit your preferences. Let’s explore some creative ways to customize the filling.
Start by playing with cheese blends. While mozzarella and cream cheese are classic choices, adding parmesan can bring a sharp, nutty flavor. For a tangy twist, try feta or goat cheese. The key is to balance richness with texture for a filling that’s both creamy and satisfying.
Incorporate additional ingredients to add depth. Sun-dried tomatoes bring a sweet and tangy note, while fresh herbs like basil or parsley add brightness. For a smoky flavor, consider adding roasted red peppers or a pinch of paprika. These small changes can transform the dish into something entirely new.
When experimenting, remember to maintain the core method. Properly stuffing and sealing the meat ensures it stays tender and juicy. Use toothpicks to secure the edges and prevent the filling from leaking during cooking.
| Ingredient | Flavor Profile |
|---|---|
| Parmesan | Sharp, nutty |
| Sun-Dried Tomatoes | Sweet, tangy |
| Basil | Fresh, aromatic |
| Roasted Red Peppers | Smoky, sweet |
I’ve found that balancing flavors is crucial. Too much cheese can overpower the dish, while too many herbs might make it bitter. Start with small amounts and adjust as you go. This approach ensures every bite is perfectly seasoned.
Don’t be afraid to get creative! Share your unique twists in the comments below. I’d love to hear how you’ve made this recipe your own.
Nutritional Insights & Dietary Considerations
Balancing nutrition and flavor is key to creating meals that satisfy both body and soul. This dish is a perfect example, offering a blend of indulgence and health benefits. Let’s dive into the nutritional details and address common dietary questions.
Each serving contains approximately 350 calories, making it a light yet satisfying option. With 30 grams of protein per portion, it’s an excellent choice for those looking to meet their daily protein needs. The use of boneless, skinless meat ensures a leaner dish, with only 10 grams of fat per serving.
For those following specific diets, this recipe is naturally low-carb and gluten-free. The filling relies on fresh ingredients like spinach and herbs, avoiding processed additives. This makes it a versatile option for various dietary preferences.
Using olive oil adds heart-healthy fats and enhances the dish’s flavor. A single tablespoon is all you need to achieve a perfect sear. This small addition makes a big difference in both taste and nutrition.
- High in protein, with 30 grams per serving.
- Low in carbs, making it ideal for keto or low-carb diets.
- Gluten-free, suitable for those with dietary restrictions.
- Rich in healthy fats from olive oil.
This dish proves that you don’t have to choose between indulgence and health. It’s a balanced meal that satisfies your taste buds while supporting your nutritional goals. Enjoy it guilt-free, knowing every bite is packed with goodness.
The Art of Plating and Presentation
The way you present a dish can elevate it from ordinary to extraordinary. A beautifully arranged plate not only looks appealing but also enhances the dining experience. Let me share my approach to making your meal visually stunning and irresistibly inviting.
Garnishing Ideas to Impress
Garnishes add color, texture, and a finishing touch to your dish. A sprinkle of fresh herbs like parsley or basil brings a pop of green and a burst of flavor. For a gourmet touch, drizzle a bit of olive oil or balsamic glaze over the top.
Consider adding a light dusting of grated parmesan for a savory finish. Edible flowers or a few cherry tomatoes can also make the plate look vibrant and professional. These small details make a big difference.

Pairing with Perfect Side Dishes
The right side can complement your dish and complete the meal. Roasted vegetables like asparagus or zucchini add a healthy and colorful touch. A fresh salad with a light vinaigrette balances the richness of the main course.
For a heartier option, try garlic mashed potatoes or a grain pilaf. These sides not only enhance the flavors but also add variety to the plate. Here’s a quick guide to pairing:
| Side Dish | Flavor Profile |
|---|---|
| Roasted Vegetables | Savory, slightly sweet |
| Fresh Salad | Light, refreshing |
| Garlic Mashed Potatoes | Creamy, rich |
| Grain Pilaf | Nutty, aromatic |
When arranging the plate, place the main dish at the center and surround it with sides. Use a wide-rimmed plate to create negative space, making the presentation look clean and elegant.
Thoughtful plating turns a simple meal into a feast for the eyes. With these tips, you’ll impress your guests and make every meal feel special.
Storage, Reheating, and Leftover Tips
Making the most of leftovers can turn a simple meal into a week of delicious dining. With the right techniques, you can keep your dish fresh, flavorful, and safe to eat. Here’s how to store and reheat your meal like a pro.
First, store leftovers in airtight containers. This keeps the meat juicy and prevents the stuffing from drying out. Refrigerate for up to 4 days, or freeze for longer storage. Label containers with the date to track freshness.
When reheating, avoid the microwave if possible. It can dry out the dish unevenly. Instead, use the oven or stovetop for better results. Preheat the oven to 350°F and reheat for 15-20 minutes. Cover with foil to lock in moisture.
For stovetop reheating, add a teaspoon of olive oil to a skillet. Heat over medium-low for about 6 minutes, flipping halfway through. This method retains moisture and keeps the meat tender.
Always check the internal temperature with a thermometer. It should reach 165°F to ensure safety. Let the dish rest for 5 minutes before serving to redistribute juices.
| Method | Time | Tips |
|---|---|---|
| Oven | 15-20 minutes | Cover with foil to retain moisture. |
| Stovetop | 6 minutes | Add a teaspoon of olive oil. |
| Microwave | 2 minutes | Use damp paper towels to prevent drying. |
For more ideas on using leftovers, check out this Boursin Chicken, Mushroom, and Asparagus Skillet. It’s a quick and flavorful way to repurpose your meal.
With these tips, your leftovers will stay as tasty as the original. Enjoy every bite without worrying about dryness or loss of flavor!
Conclusion
Creating a meal that’s both impressive and easy is my favorite way to make dinner special. This dish combines simplicity with gourmet flavors, making it perfect for any occasion. With just a few quality ingredients and simple techniques, you can achieve tender, flavorful results every time.
My top tip is to customize the filling to suit your taste. Whether you add herbs, cheese, or veggies, the possibilities are endless. Don’t forget to sear the meat for a golden crust and finish it in the oven for even cooking.
This meal is ideal for a cozy weeknight or an elegant dinner. Plus, it keeps well as leftovers, so you can enjoy it for days. I’d love to hear how you make it your own—share your photos and feedback!
Finally, take a moment to plate your dish beautifully. A sprinkle of herbs or a drizzle of olive oil can elevate the presentation. Dinner is served—and I know you’ll love it!
FAQ
Can I use frozen spinach for the filling?
Yes, frozen spinach works great. Just make sure to thaw and drain it well to avoid excess moisture.
What’s the best way to seal the chicken after stuffing?
I use toothpicks or kitchen twine to secure the edges. It keeps the filling intact while cooking.
Can I make this dish ahead of time?
Absolutely! Prep the chicken and filling a day in advance. Store them separately and assemble before cooking.
What’s a good substitute for cream cheese?
Ricotta or goat cheese are excellent alternatives. They add a creamy texture and rich flavor.
How do I know when the chicken is fully cooked?
Use a meat thermometer. The internal temperature should reach 165°F in the thickest part.
Can I cook this in an air fryer?
Yes! Air fry at 375°F for about 15-20 minutes, flipping halfway through for even cooking.
What sides pair well with this dish?
I love serving it with roasted veggies, mashed potatoes, or a fresh salad for a balanced meal.
How do I store leftovers?
Keep them in an airtight container in the fridge for up to 3 days. Reheat in the oven for the best texture.
Can I add other ingredients to the filling?
Definitely! Sun-dried tomatoes, mushrooms, or bacon bits can add extra flavor and texture.
Is this recipe gluten-free?
Yes, as long as you use gluten-free ingredients for the filling and seasoning, it’s a great gluten-free option.
There are no reviews yet. Be the first one to write one.